Set up a Svelte todo list on self-hosted Supabase + Email sign up + Google, Facebook Auth + host on GitHub pages
In this tutorial. I will guide you through creating a to-do list web app using Svelte as the front end hosted on GitHub pages, and Supabase as the back end. I will also discuss how to set up an email authentication, as well as google and Facebook third-party OAuth. The outcome would be like this from this Github repo.
Important information
This is my second time making a tutorial, if there is anything unclear, feel free to ask in the comments and I'll try to reply to them.
This tutorial assumes you are using a self-hosted Supabase. If you are using a managed Supabase you should follow the instructions on the GitHub page instead.
If you don't already have a self-hosted Supabase, check out my other tutorial How to Self-host Supabase and come back to this tutorial afterwards.
Create a GitHub repository for the Svelte App
We will host our svelte app on GitHub pages. It is a static site hosting service that host files straight out of a repository on GitHub. It has the benefit of being free and has pretty good bandwidth since it is hosted by a big company.
We first need to create a GitHub repository. if you don't have GitHub Pro, you must create a public repository in order to share your site with GitHub pages, but with GitHub Pro, both private and public repositories support GitHub pages.
For the repository name, you can choose any name you want unless you want to page to be on your main GitHub page (Main GitHub page means the website on your {github_username}.github.io). If so, you need to name your repository as {github_username}.github.io.
If you name your repository other things, your website would have a link of {github_username}.github.io/{project_name} . In my case, my website would be on https://chit-uob.github.io/svelte_supabase_todo_example.
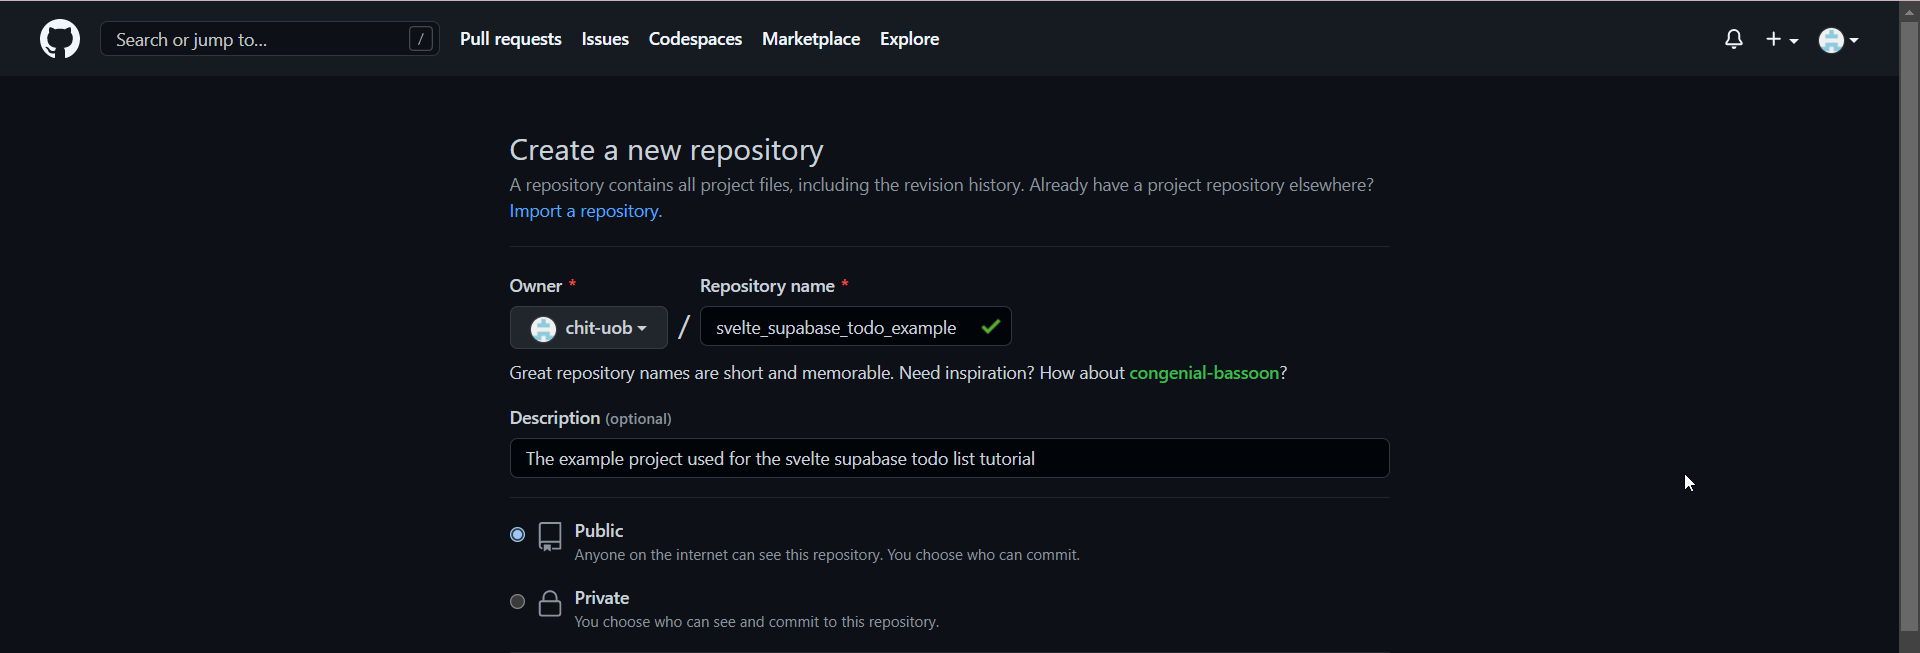
You can then click Create Repository.
Clone To-do list example
Then we clone the Svelte to-do list example from the Supabase GitHub. We choose a folder to put the project, and then we clone it with the sparse setting, this clones the repository without downloading every single file. Then we can go inside the repository and spare-checkout the to-do list example.
Make sure you have Git installed, install from here if you don't already
To open the command prompt on windows, you can right-click an empty space on the folder, and choose Open in Windows Terminal
git clone --depth 1 --filter=blob:none --sparse https://github.com/supabase/supabase
cd supabase
git sparse-checkout set examples/todo-list/sveltejs-todo-list
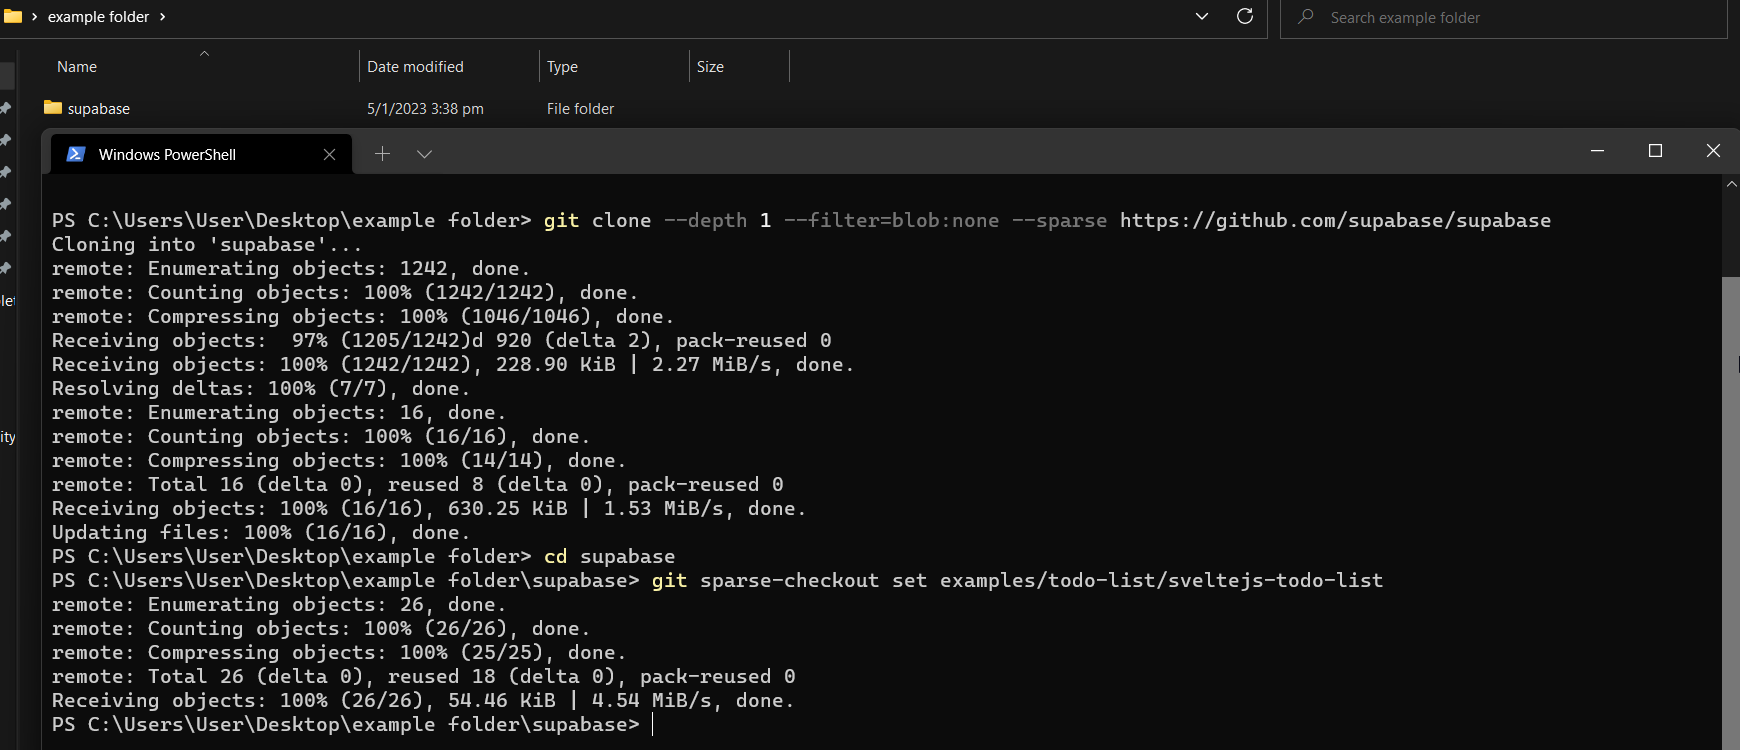
Now we can go in supabase -> examples -> todo-list , and copy the sveltejs-todo-list folder to another folder you use for the project. I am going to use the same example folder. Then we open the terminal inside the sveltejs-todo-list folder, and run the following commands.
git init
git add .
git commit -m "first commit"
git branch -M main
git remote add origin https://github.com/{github_username}/{repo_name}.git
git push -u origin main
- If you haven't already logged in to GitHub, it may prompt you to log in with your credentials

Configure front end
Then we install the GitHub pages npm package
- You need Node.js installed for this, install it from here if not already
npm install gh-pages --save-dev
Set up package.json
Inside the file package.json, we add a "homepage" property and set it as https://{github_username}.github.io/{project_name}, and a "deploy" inside the "script" property and set it as gh-pages -d dist, so lines 4-10 should look something like this:
  "version": "2.0.0",
  "type": "module",
  "homepage": "https://chit-uob.github.io/svelte_supabase_todo_example",
  "scripts": {
    "deploy": "gh-pages -d dist",
    "dev": "concurrently \"npm run dev:css\" \"vite\"",
    "dev:css": "tailwindcss -w -i ./src/tailwind.css -o src/assets/app.css",
Then we copy the .env.example file, and rename it to .env . Inside there we fill in the backend URL and anon key. If you followed my last tutorial, VITE_SUPABASE_URL would be your backend domain name. Otherwise, it would be whatever you set your API_EXTERNAL_URL inside the .env file inside the Supabase docker folder. As for VITE_SUPABASE_ANON_KEY , it is the value of ANON_KEY in the Supabase docker folder .env file.
...
JWT_SECRET=...
ANON_KEY={THIS IS THE ANON KEY}
SERVICE_ROLE_KEY=...
...
## General
...
DISABLE_SIGNUP=...
API_EXTERNAL_URL={THIS IS THE SUPABASE URL}
...
- You should then add
.envto the.gitignorefile, in order to not commit your secret keys.
If not a user site nor custom domain: set up vite.config.ts
If you are not using the user site (username.github.io), or you are not using a custom domain, then you would need to configure the vite.config.ts , and set base to your repository name, so lines 5-8 look something like this:
// https://vitejs.dev/config/
export default defineConfig({
  base: '/svelte_supabase_todo_example/',
  plugins: [svelte()],
...
This is because normally Vite looks for files in the main URL, which would be username.github.io/{whatever_file} , but since we want it to look for files inside username.github.io/{project_name}/{whatever_file} , we need to set the base to the project name.
Change front-end authentication
The original code uses GitHub and Google auth, but we want to use Facebook and Google auth instead, so inside the src/lib/Auth.svelte file, in line 114, we change it into on:click={() => handleOAuthLogin("github")} . In line 118, we change it into Facebook .
Optional: Mapping a custom domain to the GitHub page
if you have a custom domain, you have to create a file called CNAME inside the public folder, with the content being the custom domain. And change the homepage inside the package.json to be the custom domain.

Navigate to your DNS provider and create a CNAME record that points your subdomain to the default domain for your site. For example, if you want to use the subdomain subdomain.example.com for your user site, create a CNAME record that points subdomain.example.com to <user>.github.io. Also, add A Record with host @ and value 185.199.108.153, 185.199.109.153, 185.199.110.153, 185.199.111.153. So your record looks like this:
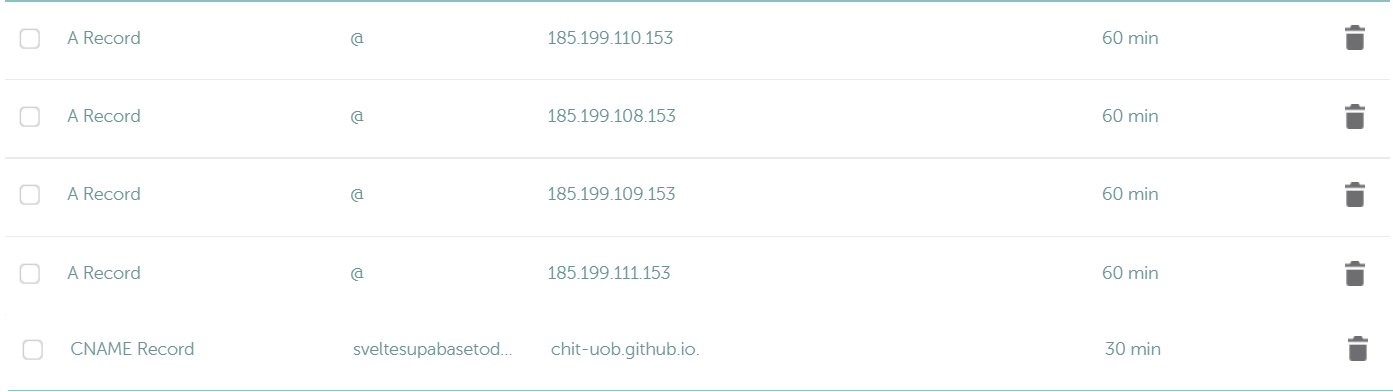
Side note: when I was testing this, GitHub seems to dislike having dashes
-or underscore_inside the subdomainIf you used a user site
<user>.github.io, every other project site you use afterwards, will start with your custom domain, instead of<user>.github.io.
Deploy with GitHub pages
We can install the necessary packages, build the project, and then deploy it.
npm install
npm run build
npm run deploy
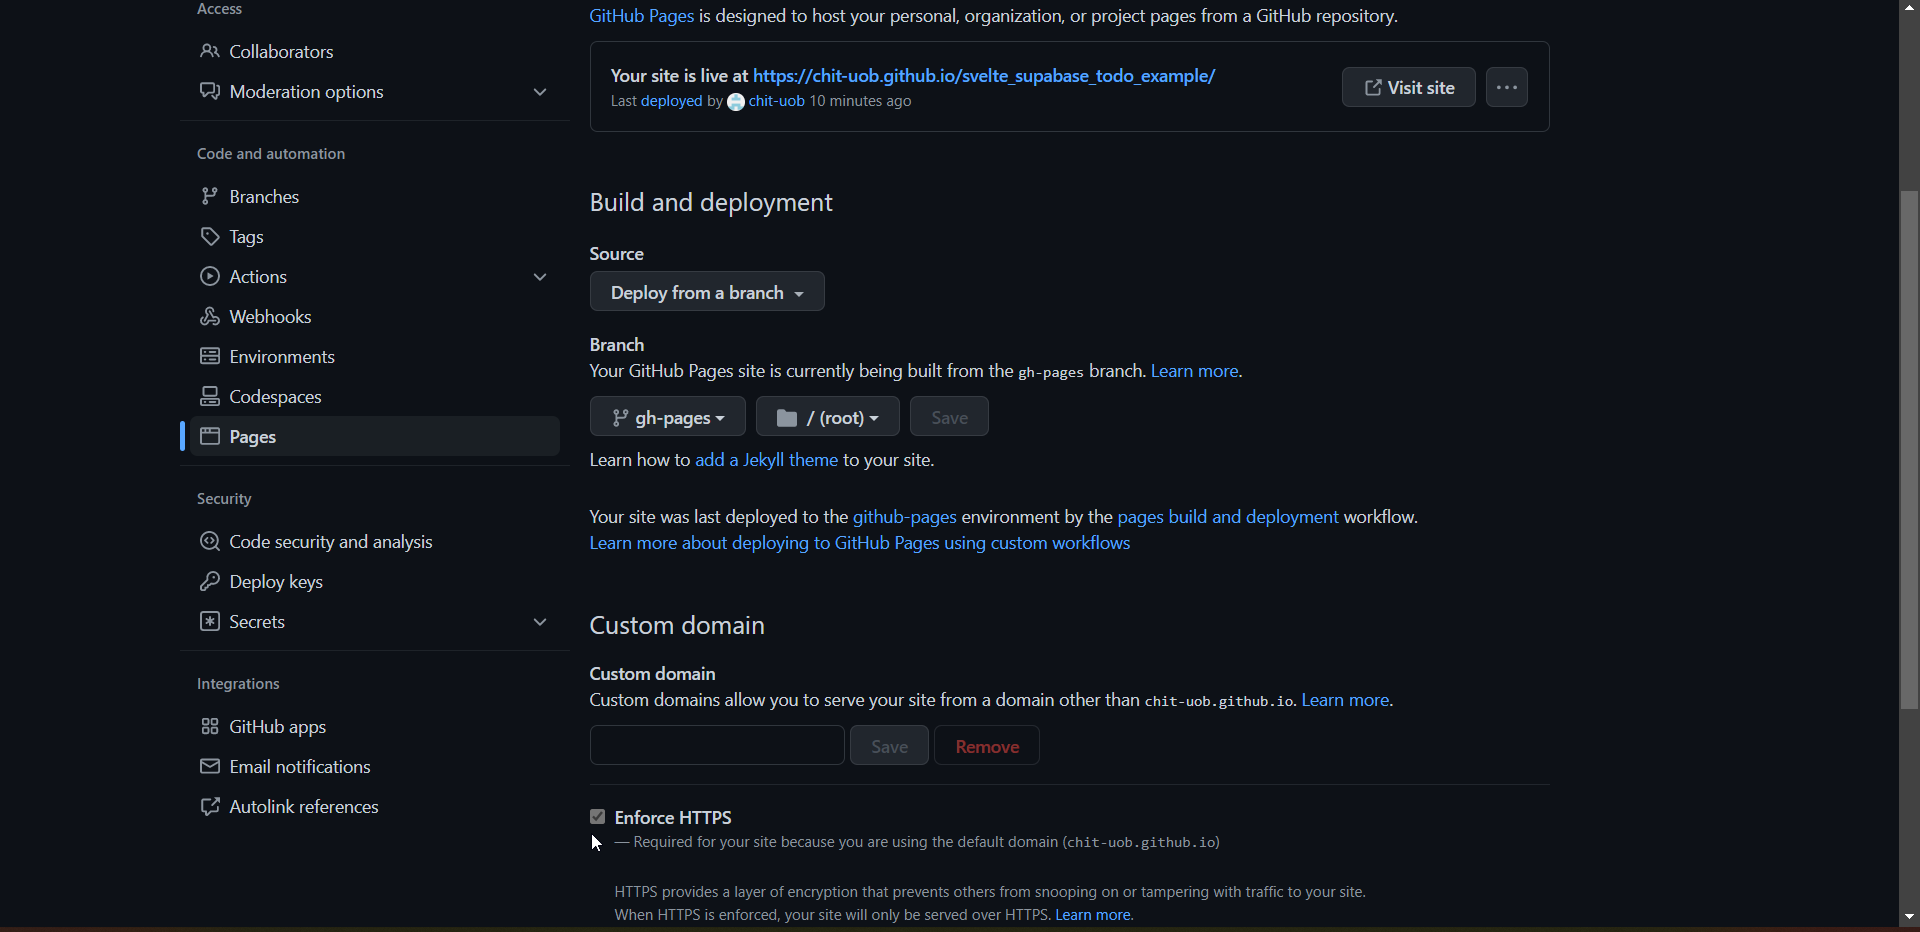
We then visit the repository on GitHub and go to Settings -> Pages, select Deploy from a branch, and select gh-pages as the branch. Then we can optionally enable HTTPS too.
If you used a custom domain, the page would like something like this:
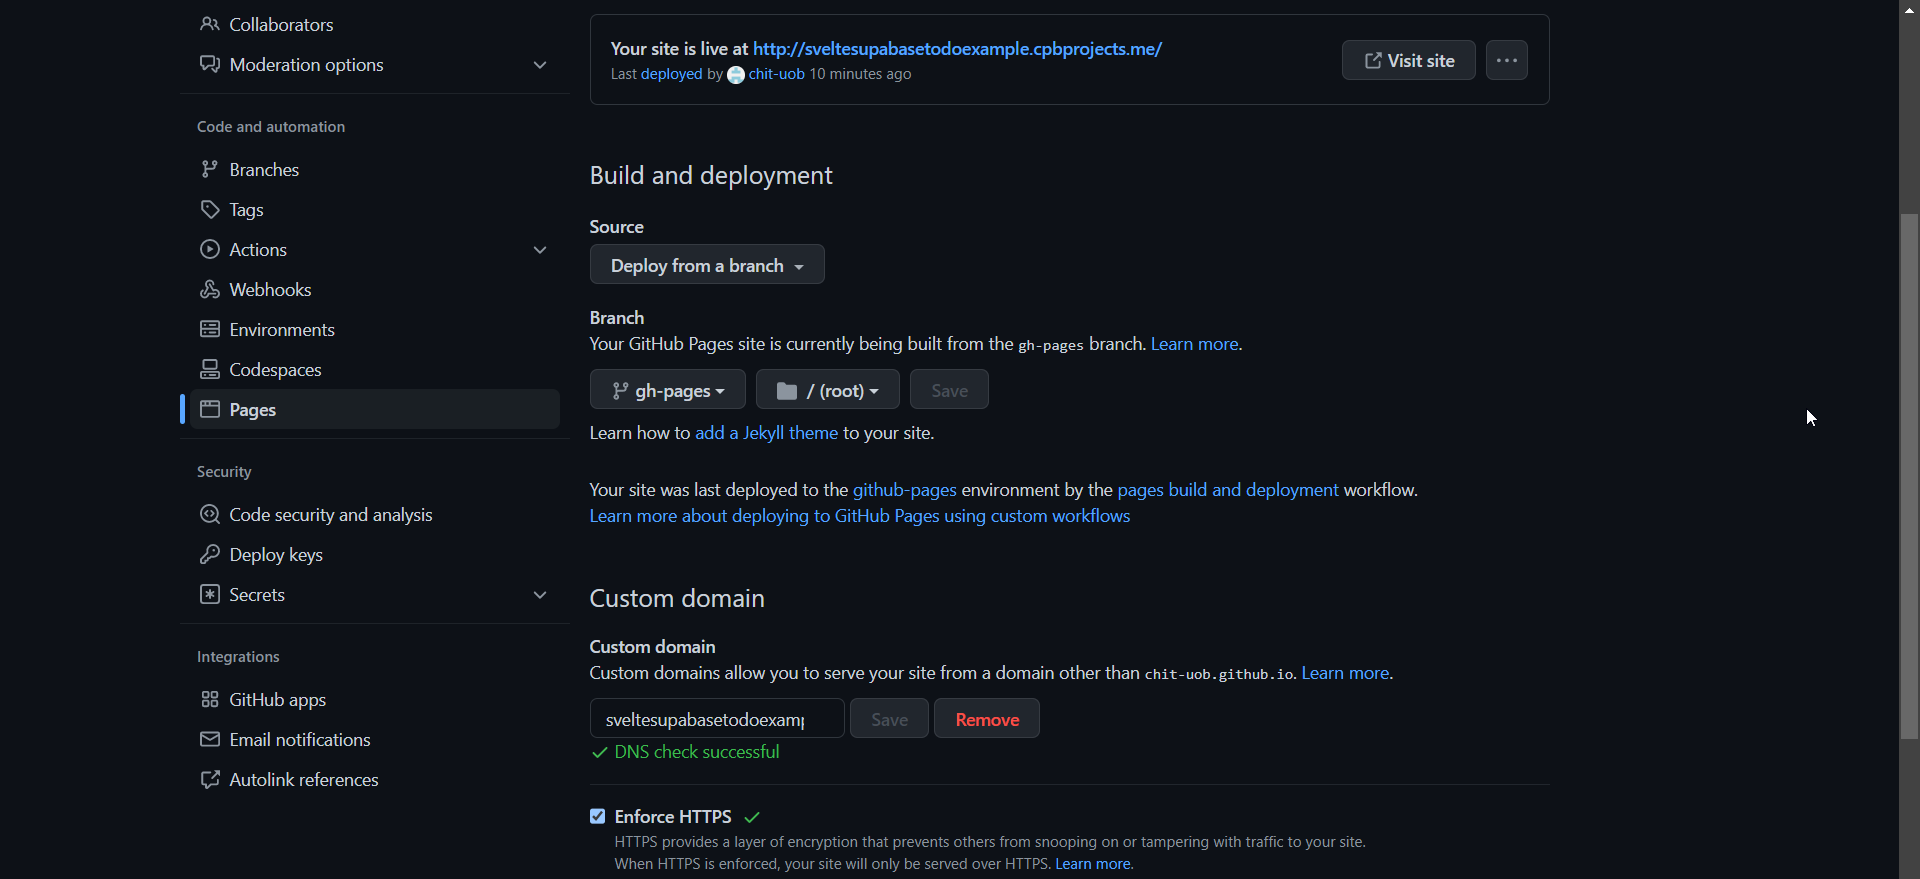
Congratulations! When you go to the URL stated above, you will be able to visit the website.
However, only the front end is working for now, in order to have a full-fletch web application, we need the backend to work as well.
Make the database table
The initial Supabase database given to us only contains the auth tables, we need to create the profiles table and todo table on our own. In the hosted version, the snippets are provided, but since we are self-hosting, we will have to copy them from there.
I created a Supabase account, created a project, and then copied the snippet. For you, you can just copy the following code to the run panel and run it.

Go to the Supabase dashboard, inside the default project -> SQL editor, we can paste the following code there, and click run to run them.
Then for the todo list
Email sign up
To enable email sign-up, we need our backend to be able to send emails. Email servers are very difficult to host, so we will use an SMTP relay service, and have them send the emails for us. There are many choices, I chose to use Sendinblue because it has the biggest free tier email sending limit. It can send up to 300 emails per day, which means up to 9000 emails per month. You can use whatever service you want, you just need to get the required credentials.
Get the credentials from Sendinblue
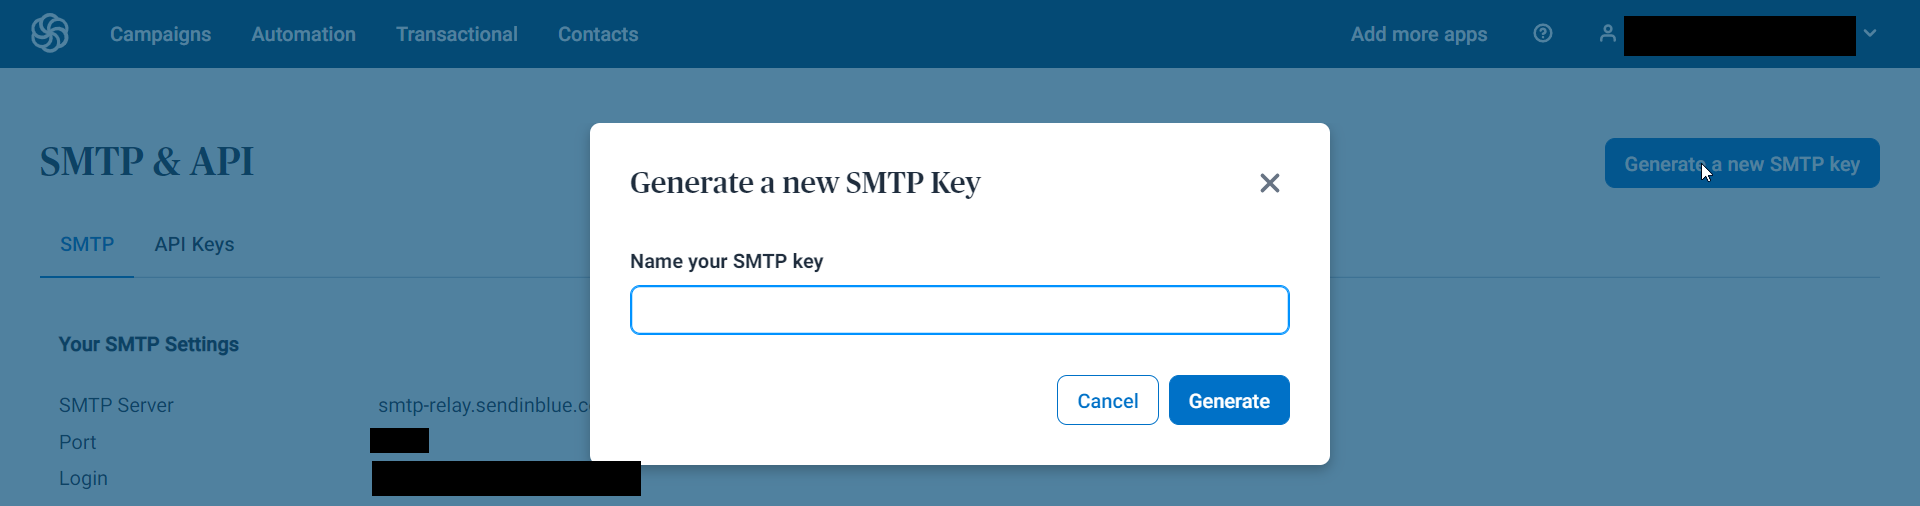
Create an account in Sendinblue. In the dashboard, click on the Profile in the upper right corner -> SMTP and API.
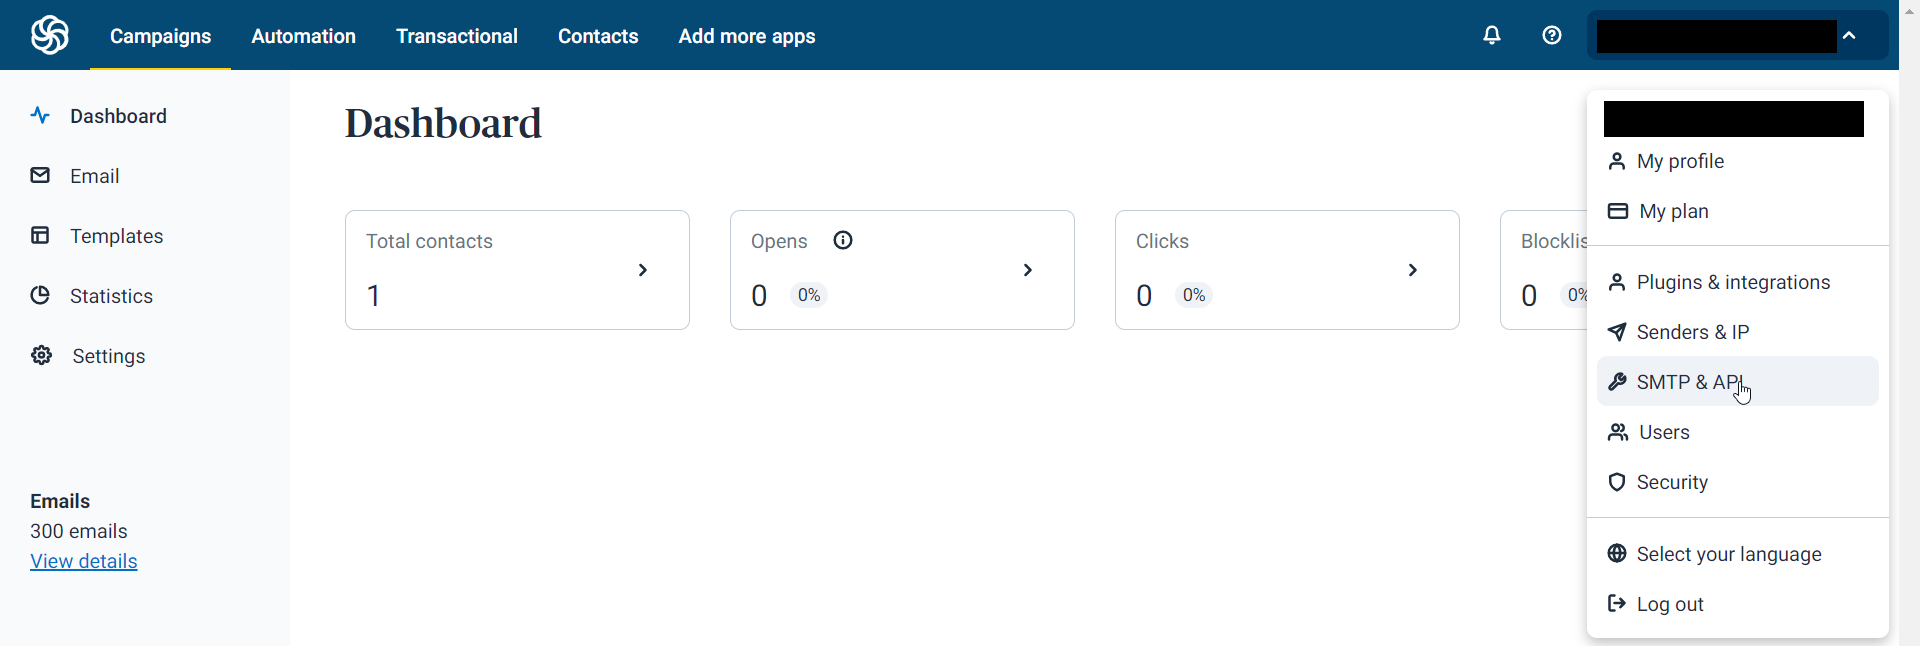
Inside that page, we need the SMTP Server, Port, Login. We also need to generate an SMTP key, which would act as the password.
Fill in the credentials in the self-hosted Supabase
Going back to the Supabase backend, in the supabase/docker/ directory inside the .env file, we can paste the respective values inside the respective field.
## Email auth
ENABLE_EMAIL_SIGNUP=true
ENABLE_EMAIL_AUTOCONFIRM=false
SMTP_ADMIN_EMAIL={The email address you want the email to be from}
SMTP_HOST=smtp-relay.sendinblue.com
SMTP_PORT={The port given to you}
SMTP_USER={Your login}
SMTP_PASS={Your SMTP key}
SMTP_SENDER_NAME={The name of the sender of your choosing}
Social OAuth
We also want to enable Open Authentication login, because it skips the step of creating an account for the user, so users will more likely be inclined to sign up to your site.
Supabase already has a guide on this, however, that is for the managed version, for the self-hosted version, there is something we need to do differently.
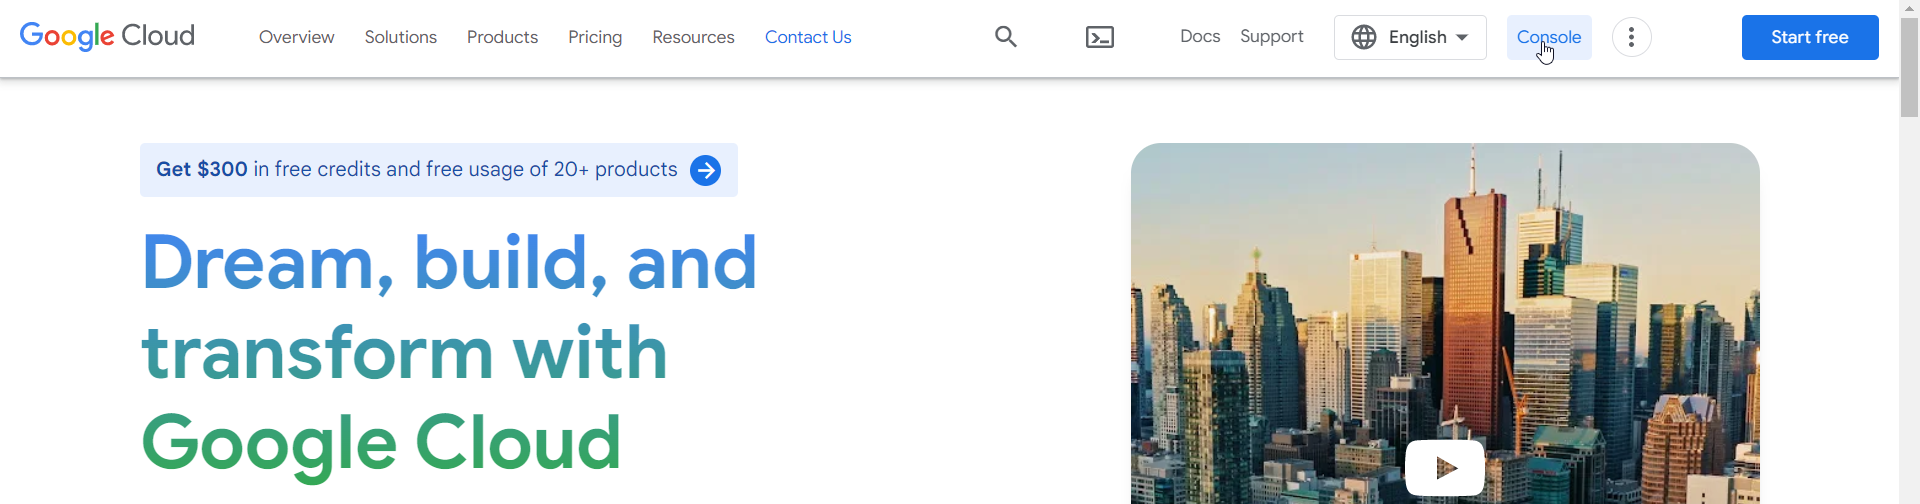
First, go to https://cloud.google.com/, Sign in to google if not already, and then click console. It will prompt you to accept the terms of service.
Inside there, click on Select a Project at the top left and click new project. Fill in your app information then click Create, this will take you to the dashboard for the new project.
In the search bar at the top labelled Search products and resources type OAuth. Click on OAuth consent screen from the list of results. On the OAuth consent screen page select External. Click Create.
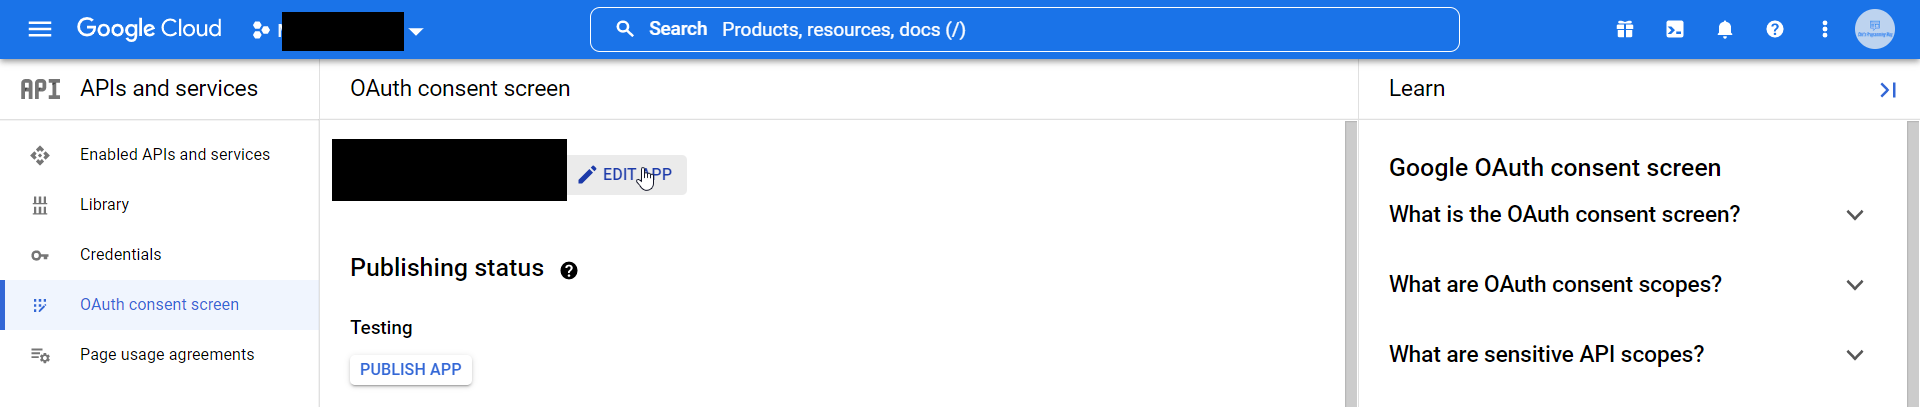
On the Edit app registration page fill out your app information. The Application home page is your Svelte website, and The Authorised domain is the domain of your website. Click Save and continue at the bottom.
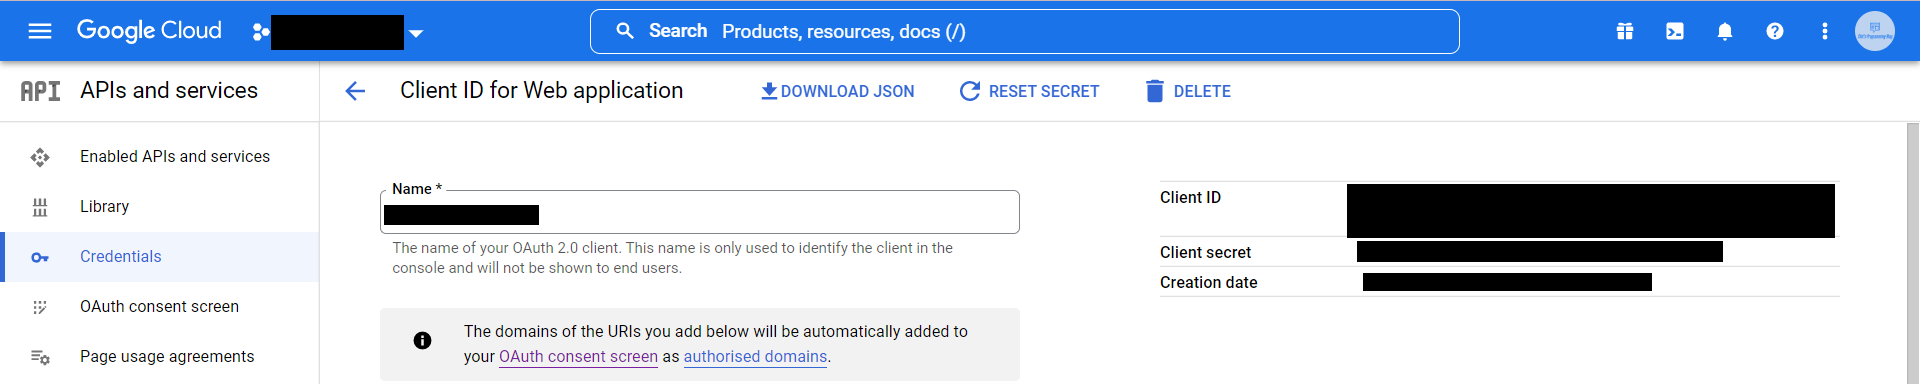
Click Credentials at the left to go to the Credentials page on the Google Cloud Platform console. Click Create Credentials near the top then select OAuth client ID . On the Create OAuth client ID page, select your application type. If you're not sure, choose Web application. Fill in your app name. At the bottom, under Authorized redirect URIs click Add URI.
Your URI should be what you set as the API_EXTERNAL_URL inside the supabase docker .env file + /auth/v1/callback. For example, https://mybackend.com/auth/v1/callback. Enter your callback URI under Authorized redirect URIs at the bottom. Enter your callback URI in the Valid OAuth Redirect URIs box. Click Save Changes at the bottom right. Click Create. Then we need to copy and save the values under Your Client ID and Your Client Secret.
Then we can go back to the supabase docker .env file, and add the following code
## Google auth
ENABLE_GOOGLE_SIGNUP=true
GOOGLE_CLIENT_ID={the_client_id_given_to_you}
GOOGLE_CLIENT_SECRET={the_client_secret_given_to_you}
And in the supabase docker docker-compose.yml file, under the auth environment section, (around line 87), we fill in the following:
GOTRUE_EXTERNAL_GOOGLE_ENABLED: ${ENABLE_GOOGLE_SIGNUP}
GOTRUE_EXTERNAL_GOOGLE_CLIENT_ID: ${GOOGLE_CLIENT_ID}
GOTRUE_EXTERNAL_GOOGLE_SECRET: ${GOOGLE_CLIENT_SECRET}
GOTRUE_EXTERNAL_GOOGLE_REDIRECT_URI: {the_callback_uri}
Around this part is a lot of GOTRUE_..., so it should be pretty easy to find. Keep in mind that the ${} things should be taken literally, you shouldn't replace the string inside ${}, but do replace {the callback uri} with the actual callback uri.
The Facebook guide can also be found on the Supabase guide, I am going to briefly go through what you need to do, and the self-hosted instructions not included in their guide.
We first create and configure a Facebook Application on the Facebook Developers Site. We first login. Click on My Apps at the top right. Click Create App near the top right. Select your app type and click Continue (Do NOT choose "business", it complicates things). Fill in your app information, then click Create App. This should bring you to the screen: Add Products to Your App. (Alternatively you can click on Add Product in the left sidebar to get to this screen.)
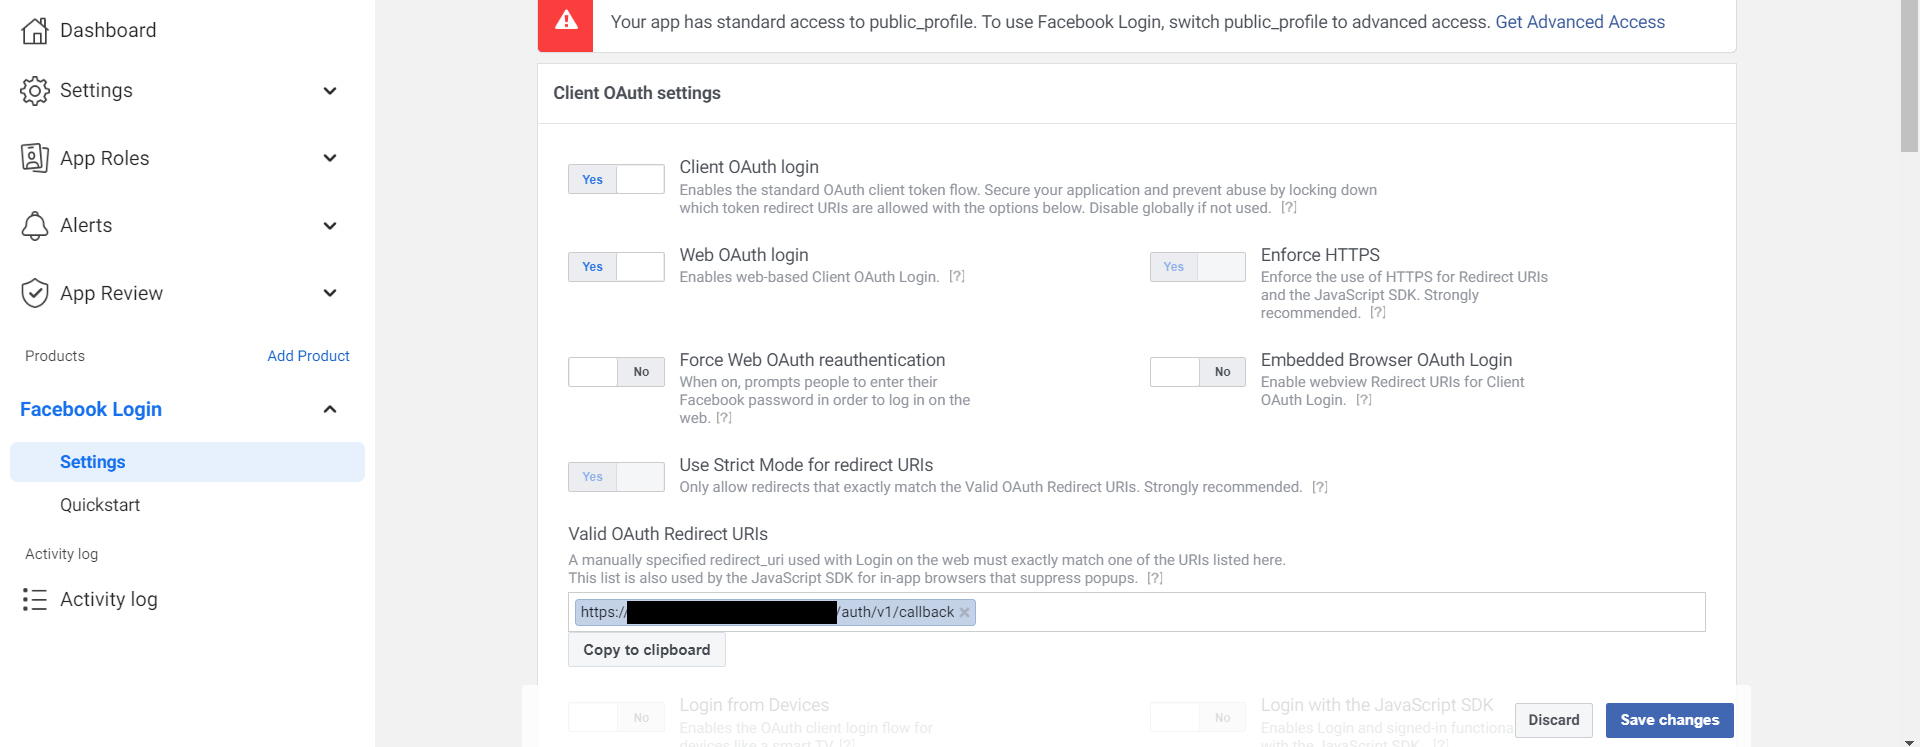
From the Add Products to your App screen, we can click Setup under Facebook Login . Skip the Quickstart screen, instead, in the left sidebar, click Settings under Facebook Login . Enter your callback URI under Valid OAuth Redirect URIs on the Facebook Login Settings page. Enter this in the Valid OAuth Redirect URIs box. Click Save Changes at the bottom right.
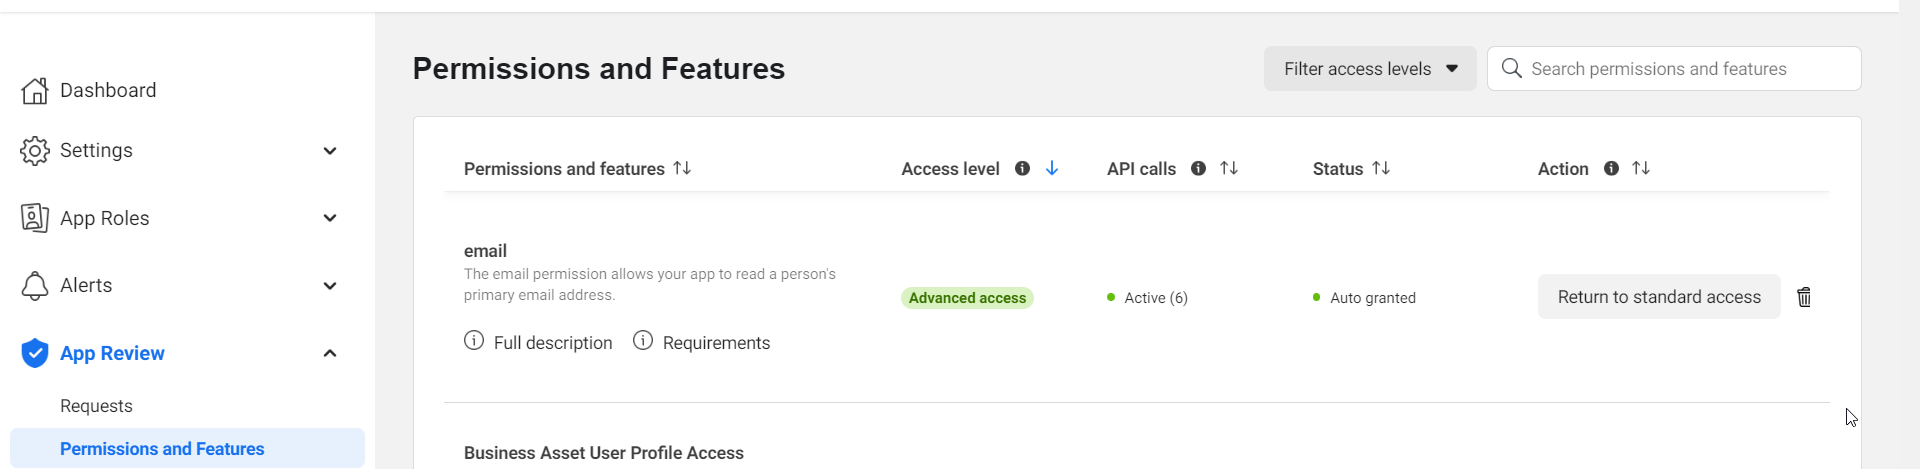
Be aware that you have to set the right access levels on your Facebook App to enable 3rd party applications to read the email address. From the App Review -> Permissions and Features screen: Click the button Request Advanced Access on the right side of public_profile and email .
Click Settings / Basic in the left sidebar. Copy your App ID from the top of the Basic Settings page. Under App Secret click Show then copy your secret. Make sure all required fields are completed on this screen.
Then similarly, we go to the supabase docker .env file, and add the following code:
## Facebook auth
ENABLE_FACEBOOK_SIGNUP=true
FACEBOOK_CLIENT_ID={the_id}
FACEBOOK_CLIENT_SECRET={the_secret}
And in the supabase docker docker-compose.yml file, under the google stuff we just added, we add:
GOTRUE_EXTERNAL_FACEBOOK_ENABLED: ${ENABLE_FACEBOOK_SIGNUP}
GOTRUE_EXTERNAL_FACEBOOK_CLIENT_ID: ${FACEBOOK_CLIENT_ID}
GOTRUE_EXTERNAL_FACEBOOK_SECRET: ${FACEBOOK_CLIENT_SECRET}
GOTRUE_EXTERNAL_FACEBOOK_REDIRECT_URI: {the_callback_uri}
- Note that both Google and Facebook Auth are in testing mode, to use them in production, you need to change them to production mode.
Replace site URL
also inside the supabase docker .env file, you can change the SITE_URL=http://localhost:3000 , and set the URL to the URL of your front-end website.
Restart Supabase
Now that everything is set, you can restart Supabase. If you followed my last tutorial, Supabase would be running inside a screen, do screen -r supabase , then ctrl + c to stop the already running docker, then docker compose up to start the docker again. If it is not already running, you can just do docker compose up inside the supabase docker directory to start Supabase.
Conclusion
Now you should get a fully functional to-do list web app, you can try the different logins, from email sign-up and sending an email to confirm your account, to one-click OAuth with Google and Facebook. After logging in, you can also add and remove to-do items, and they will stay there when you log in with different devices.
This is my second touch on making a tutorial, if there are any steps unclear, feel free to leave a comment and I'll try to answer them. hope this tutorial helps.
![Focuster review: My experience as a student in summer [week 3]](/_next/image?url=https%3A%2F%2Fcdn.hashnode.com%2Fres%2Fhashnode%2Fimage%2Fupload%2Fv1693222238382%2F06452c01-14a3-423a-9311-83b9d82f6fcc.png&w=3840&q=75)
![Reclaim.AI review: My experience as a student in internship [week 2]](/_next/image?url=https%3A%2F%2Fcdn.hashnode.com%2Fres%2Fhashnode%2Fimage%2Fupload%2Fv1692385558997%2F5cd2253e-b50d-4d47-9aad-72807848b1a9.png&w=3840&q=75)
![Motion Review: My experience as a student in internship [week 1]](/_next/image?url=https%3A%2F%2Fcdn.hashnode.com%2Fres%2Fhashnode%2Fimage%2Fupload%2Fv1690840123756%2F5bdf844a-d728-430c-8d9b-b88b7b77c726.png&w=3840&q=75)
![Trialling Productivity Tools to Rescue My Time [Week 0]](/_next/image?url=https%3A%2F%2Fcdn.hashnode.com%2Fres%2Fhashnode%2Fimage%2Fupload%2Fv1690321356599%2F2f404dbe-3c2a-421b-903c-04d72c8febed.png&w=3840&q=75)